How To Create Amazon S3 Presigned URLs with .NET
Your application needs to temporarily expose private files which are stored in Amazon S3. Giving each user separate permissions to each file is not feasible and will not scale. There are a few reasonable solutions for this situation, but Amazon S3 presigned URLs might be the simplest.
Amazon S3 presigned URLs allow an object owner to grant temporary access to an object in a private bucket by sharing a URL. However, this is no ordinary URL. An Amazon S3 presigned URL contains 4 major components : the location of the file, the AWS access key Id of the user that is granting access to the object (AWSAccessKeyId), the object expiration (Expires) and the signature (Signature). The location of the file is obvious, but what about the other attributes?
- AWSAccessKeyId: represents the user that is granting access to the object. AWS will use the AWSAccessKeyId to validate the signature.
- Expires: The expiration is set by the user granting access. The expiration could be a very short window of time or it could last days.
- Signature: when validated, proves that the signer authorized the request and had possession of the access key and corresponding secret.
An important aspect to remember is that Amazon S3 presigned URLs are much like a Bearer token, in that, if you have possession of the token, you have access to the resources it grants rights to. In other words, anyone that possesses the Amazon S3 presigned URL has the granted rights to that object, until expiration. Checkout this article for more information on limiting capabilities to Amazon S3 presigned URLs.

The Solution
In this tutorial, we will build an ASP.NET API that will have one endpoint that will create and upload an object to an S3 bucket and return an Amazon S3 presigned URL. In addition, we will create the S3 bucket from the AWS S3 CLI.
Remember, for any example solution from AWS with .NET, we focus on the code that exemplifies the problem we are trying to solve. We don’t include logging, input validation, exception handling, etc., and we embed the configuration data within classes instead of using environment variables, configuration files, key/value stores and the like. These items should not be skipped for proper solutions.
Prerequisites
To complete this solution, you will need the .NET CLI which is included in the .NET SDK. In addition, you will need to download the AWS CLI and configure your environment. You will also need to create an IAM user with programmatic access to Amazon S3 with the appropriate permissions to create buckets, list and upload objects and sign URLs.
Warning: some AWS services may have fees associated with them.
Create an S3 Bucket from the CLI
The first thing we will do is create the S3 bucket that we will work with in this solution.
Let’s create that S3 bucket by running the following command:
$ aws s3 mb s3://(your_bucket_name)
When complete, you should get a response like the following. Make sure to record the bucket name.
$ make_bucket: (your_bucket_name)
Create an ASP.NET API from the CLI
Let’s create our ASP.NET Test API with the following command:
$ dotnet new webapi --name Api
With our API in place, let’s add the dependency to the AWS S3 .NET SDK.
$ dotnet add ./Api/ package AWSSDK.S3
Great! With our API application ready to go, let’s start to code.
First, let’s create a class named CreateSignedUrlRequest. This class will contain the data that we will pass to our API upload endpoint. The CreateSignedUrlRequest will have two properties – Content and TimeToLiveInHours. The class should look like the following:
using System.ComponentModel.DataAnnotations;

namespace Api.Models
{
    public class CreateSignedUrlRequest
    {
        public string Content { get; set; }

        public double TimeToLiveInHours { get; set; }
    }
}
Let’s now create a controller named UploadController with one method named, “Post.”
using Amazon;
using Amazon.S3;
using Amazon.S3.Model;
using Api.Models;
using Microsoft.AspNetCore.Mvc;

namespace Api.Controllers;

[ApiController]
[Route("[controller]")]
public class UploadController : ControllerBase
{

    [HttpPost]
    public async Task<IActionResult> Post(CreateSignedUrlRequest createSignedUrlRequest)
    {


    }
}
This Post method will have two main tasks. The first is to create and upload an object. The key of the S3 object will be generated at runtime by creating a string based on a new GUID and the contents of the file will be the value of the “Contents” property of the CreateSignedUrlRequest object that gets passed into the Post method. We’ll take those two values along with the bucket name (created earlier) and instantiate a PutObjectRequest, then send it on its way to the AWS S3 SDK, waiting for the PutObjectResponse. Let’s take a look.
string bucketName = "";
string key = Guid.NewGuid().ToString() + ".txt";
RegionEndpoint bucketRegion = RegionEndpoint.USEast1;

var client = new AmazonS3Client(bucketRegion);

var putRequest = new PutObjectRequest
{
    BucketName = bucketName,
    Key = key,
    ContentBody = createSignedUrlRequest.Content
};

PutObjectResponse putObjectResponse = await client.PutObjectAsync(putRequest);
The second task of the Post method is to create a presigned URL for the S3 object that was uploaded. Here, we will create a GetPreSignedUrlRequest object using the bucket name, the key and by setting the Expires property. For the Expires property, we take the current time and add a certain number of hours to it. The number of hours added to the current time comes from the TimeToLiveInHours property of the CreateSignedUrlRequest object that was passed into the Post method. Once we have the GetPreSignedUrlRequest object ready, we then send it to the S3 SDK and wait for the presigned URL to be returned.
GetPreSignedUrlRequest preSignedUrlRequest = new GetPreSignedUrlRequest
{
    BucketName = bucketName,
    Key = key,
    Expires = DateTime.UtcNow.AddHours(createSignedUrlRequest.TimeToLiveInHours)
};

string preSignedUrl = client.GetPreSignedURL(preSignedUrlRequest);
We then complete the Post method by returning the presigned URL wrapped in the Ok method which returns a 200 HTTP status code and the presigned URL. Let’s take a look at the complete UploadController class with the finished Post method.
using Amazon;
using Amazon.S3;
using Amazon.S3.Model;
using Api.Models;
using Microsoft.AspNetCore.Mvc;

namespace Api.Controllers;

[ApiController]
[Route("[controller]")]
public class UploadController : ControllerBase
{

    [HttpPost]
    public async Task<IActionResult> Post(CreateSignedUrlRequest createSignedUrlRequest)
    {

        string bucketName = "";
        string key = Guid.NewGuid().ToString() + ".txt";
        RegionEndpoint bucketRegion = RegionEndpoint.USEast1;

        var client = new AmazonS3Client(bucketRegion);

        var putRequest = new PutObjectRequest
        {
            BucketName = bucketName,
            Key = key,
            ContentBody = createSignedUrlRequest.Content
        };

        PutObjectResponse putObjectResponse = await client.PutObjectAsync(putRequest);

        GetPreSignedUrlRequest preSignedUrlRequest = new GetPreSignedUrlRequest
        {
            BucketName = bucketName,
            Key = key,
            Expires = DateTime.UtcNow.AddHours(createSignedUrlRequest.TimeToLiveInHours)
        };

        string preSignedUrl = client.GetPreSignedURL(preSignedUrlRequest);

        return Ok(preSignedUrl);

    }
}
Testing the S3 Presigned URL API
With the API complete, let’s take it for a test drive. To test the API, we’ll use Swagger UI which is included in this solution.
First, let’s start the API with the following command:
$ dotnet run --project ./Api
Then, in your browser of choice, navigate to: http://localhost:5000/swagger/index.html. You should see the following UI.
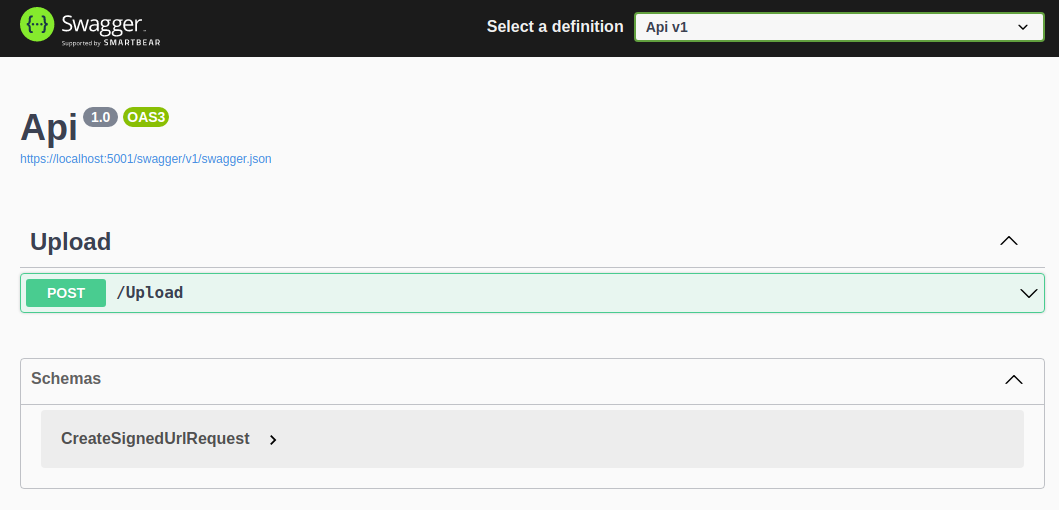
To create a presigned URL, click on the “POST” button and then click the “Try it out” button. Then, replace the text in the “Request Body” with the JSON object below and click the “Execute” button.
{
  "content": "this is a test",
  "timeToLiveInHours": 2
}
Once the request has finished, the Swagger UI app should update with a 200 response.
Copy the presigned URL from the Response body, and open a new browser tab or window and browse to that URL. When the browser is done loading, you should see the text that we sent in as the content in our API POST request.
Summary
We have concluded this tutorial where you have learned how to create and upload an S3 object and create an Amazon S3 presigned URL, all with the AWS S3 SDK for .NET. You also learned how to create an ASP.NET API using the .NET CLI and create an S3 bucket from the AWS S3 CLI.
Challenges
Now that you have a working solution, let’s take things a little further…
- Add logic in the Post method of the UploadController that will return a 400 status code if the Content and the TimeToLiveInHours properties of the CreateSignedUrlRequest are not provided.
- Use the AWS S3 CLI to list the newly created objects and bucket.
- Use the AWS Console to view the contents of the newly created S3 objects.
- Examine the content of the presigned URL after expiration.
Want to know more about the tech in this tutorial? Checkout these resources: